


In this article, we will teach you how to build an Authentication API by using JWT in Node.js to secure endpoints and even authenticate users The purpose of this tutorial is to help you learn more about how to implement JWT and make a more secure software system.
What is JWT
JSON Web Tokens (JWT) are JSON Object which is used to securely transfer information over the web. It can be used to build a token-based authentication system and can also be used for information exchange. The token is mainly composed of a header, payload, and signature.
What are authentication and authorization
In simple words, Authentication is the process of verifying a user's identification by taking some details about the user and using those details to confirm the user's identity, you need to prove your identity by providing credentials. Authorization is the process of granting authenticated users access to the data or resources and verifying whether access is allowed through policies and rules usually done after successful authentication
Prerequisites
The authorization system in this tutorial will be built using Nodejs, MongoDB so to follow along you will need the:
- A working knowledge of JavaScript.
- A good understanding of Node.js.
- A basic understanding of MongoDB.
- Postman and some knowledge of how to use Postman.
you can check out this article to learn more about javascript in detail.
Setup Environment
To get started, we'll need to set up our project to do that opening your favorite code editor and navigating to the directory of your choice on your machine and opening a terminal window in it, and running these commands:
mkdir JWT
cd JWT
npm init -y
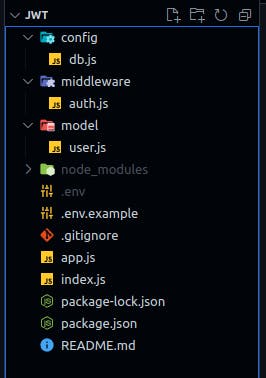
mkdir model middleware config
touch config/db.js middleware/auth.js model/user.js
touch app.js index.js
after this, you'll have everything you need to get started in your project directory like this:
Install dependencies
We’ll install several dependencies like mongoose, jsonwebtoken, express dotenv bcryptjs and development dependencies like nodemon to restart the server as we make changes automatically.
npm install mongoose express jsonwebtoken dotenv bcryptjs

npm install --save-dev nodemon
Create server and connect to Database
Now, let’s create our Node.js server and connect our database for doing this
we will use express framework import express in app.js file, and create an express app by calling express as an express app and also add express.json middleware so that we can pare request with JSON in it and we also a route '/' to check whether the application is working or not and export it.
In our app.js:
const express = require("express");

const app = express();

app.use(express.json());

app.post("/", (req, res) => {
  res.send("It works");
});

// Logic goes here

module.exports = app;
we Also need some environment variables. You can create a new .env file if you haven't and add your variables before starting our application
In our env.js:
API_PORT=3000

MONGO_URI= //Your database URI here
In our Index.js we will create out sever and start listing to the PORT
import HTTP and app.js we just created and create server and start listening to the port we defined in .env file
In our index.js:
const http = require("http");
const app = require("./app");
const server = http.createServer(app);

const { API_PORT } = process.env;
const port = process.env.PORT || API_PORT;

// server listening
server.listen(port, () => {
  console.log(`Server listening on port ${port}`);
});
Now as our server is ready to get started we can connect our database using mongoose in config/db.js import mongoose and MONGO_URI and use mongoose.connect to connect to the database this function will take URI as an argument you can also pass some options and use a then and catch block to catch any error occur.
In our config/db.js:
const mongoose = require("mongoose");
require("dotenv").config();
const { MONGO_URI } = process.env;
module.exports = mongoose.connect(MONGO_URI, () => {
  console.log("Connected to Mongo DataBase");
});
and import the database in the app.js file
In our app.js:
require("dotenv").config();
require("./config/db").connect();
To start our server in the development environment we can add the script in our package.json edit the scripts object and add two new scripts to start and dev
In our package.json
"scripts": {
    "start": "node index.js",
    "dev": "nodemon index.js",
    "test": "echo \"Error: no test specified\" && exit 1"
  }
once we have done this we are ready to run our server and test it start your server by using the command.
➜ npm run dev
// Output

> jwt@1.0.0 dev
> nodemon index.js

[nodemon] 2.0.20
[nodemon] to restart at any time, enter `rs`
[nodemon] watching path(s): *.*
[nodemon] watching extensions: js,mjs,json
[nodemon] starting `node index.js`

Server running on port 3000
Successfully connected to database
Yay! 🙌 Both the server and the database should be up and running without crashing.
Create a user model and route
Now as we created a server and connected to the database we can start defining user models and routes for registering and login.
for creating a model we will use the mongoose schema and this schema will have first_name, last_name, email, password, and token. In our model/user.js
const mongoose = require("mongoose");

const userSchema = new mongoose.Schema({
  first_name: { type: String, default: null },
  last_name: { type: String, default: null },
  email: { type: String, unique: true },
  password: { type: String },
  token: { type: String },
});

module.exports = mongoose.model("user", userSchema);
Now let’s create the routes for registering and login in, respectively.
In app.js in the root directory.
In our app.js
// importing model
const User = require("./model/user");

// Register
app.post("/register", (req, res) => {
// our register logic goes here...
});

// Login
app.post("/login", (req, res) => {
// our login logic goes here
});
Implement register and login functionality
Now we are can start working on the core logic of our application. We’ll be implementing these two routes in our application. We will be using JWT to sign the credentials and bycrypt to encrypt the password before storing them in our database.
- Get user input.
- Validate user input.
- Validate if the user already exists.
- Encrypt the user password.
- Create a user in our database.
- And finally, create a signed JWT token.
To Get user input we will access req.body and will take out first_name, last_name, email, password for that and make a const variable of it,
For validating user input we can use a simple if statement with OR operator to check whether we got all the required input or not and if we don't get all the required input we can give a response All input is required
For Validate if the user already exists or not we can search in the database to check whether the user of this same email exists in the database or not and ifwe can give a response to the user that User Already Exist, Please login
For Encrypting the user password we can use bcrypt library we imported and use the hash method to hash the password.
Then create a user in the database by defining all values and using create method on the User model.
Create a token variable and use JWT library we imported and the sign method to create a new token with the user's ID and email
we will implement all logic in /register route we created earlier
In our app.js
app.post("/register", async (req, res) => {

  // Our register logic starts here
  try {
    // Get user input
    const { first_name, last_name, email, password } = req.body;

    // Validate user input
    if (!(email && password && first_name && last_name)) {
      res.status(400).send("All input is required");
    }

    // check if user already exist
    // Validate if user exist in our database
    const oldUser = await User.findOne({ email });

    if (oldUser) {
      return res.status(409).send("User Already Exist. Please Login");
    }

    //Encrypt user password
    encryptedPassword = await bcrypt.hash(password, 10);

    // Create user in our database
    const user = await User.create({
      first_name,
      last_name,
      email: email.toLowerCase(), // sanitize: convert email to lowercase
      password: encryptedPassword,
    });

    // Create token
    const token = jwt.sign(
      { user_id: user._id, email },
      process.env.TOKEN_KEY,
      {
        expiresIn: "2h",
      }
    );
    // save user token
    user.token = token;

    // return new user
    res.status(201).json(user);
  } catch (err) {
    console.log(err);
  }
  // Our register logic ends here
});
Using Postman to test the endpoint, we’ll get the response shown below after successful registration.

For the /login route, we will:
- Get user input.
- Validate user input.
- Validate if the user exists.
- Verify user password against the password we saved earlier in our database.
- And finally, create a signed JWT token.
I already told you how to Get user input Validate it and check whether the user exists or not now let's see how can we Verify the user's password and email and sign the user.
To compare password user input and the password we have in the database we will use library bcrypt which has compare method to check whether the password matches or not and after verifying the password we can sign a new token just like before.
we will implement all logic in /login route we created earlier
app.post("/login", async (req, res) => {

  // Our login logic starts here
  try {
    // Get user input
    const { email, password } = req.body;

    // Validate user input
    if (!(email && password)) {
      res.status(400).send("All input is required");
    }
    // Validate if user exist in our database
    const user = await User.findOne({ email });

    if (user && (await bcrypt.compare(password, user.password))) {
      // Create token
      const token = jwt.sign(
        { user_id: user._id, email },
        process.env.TOKEN_KEY,
        {
          expiresIn: "2h",
        }
      );

      // save user token
      user.token = token;

      // user
      res.status(200).json(user);
    }
    res.status(400).send("Invalid Credentials");
  } catch (err) {
    console.log(err);
  }
  // Our register logic ends here
});
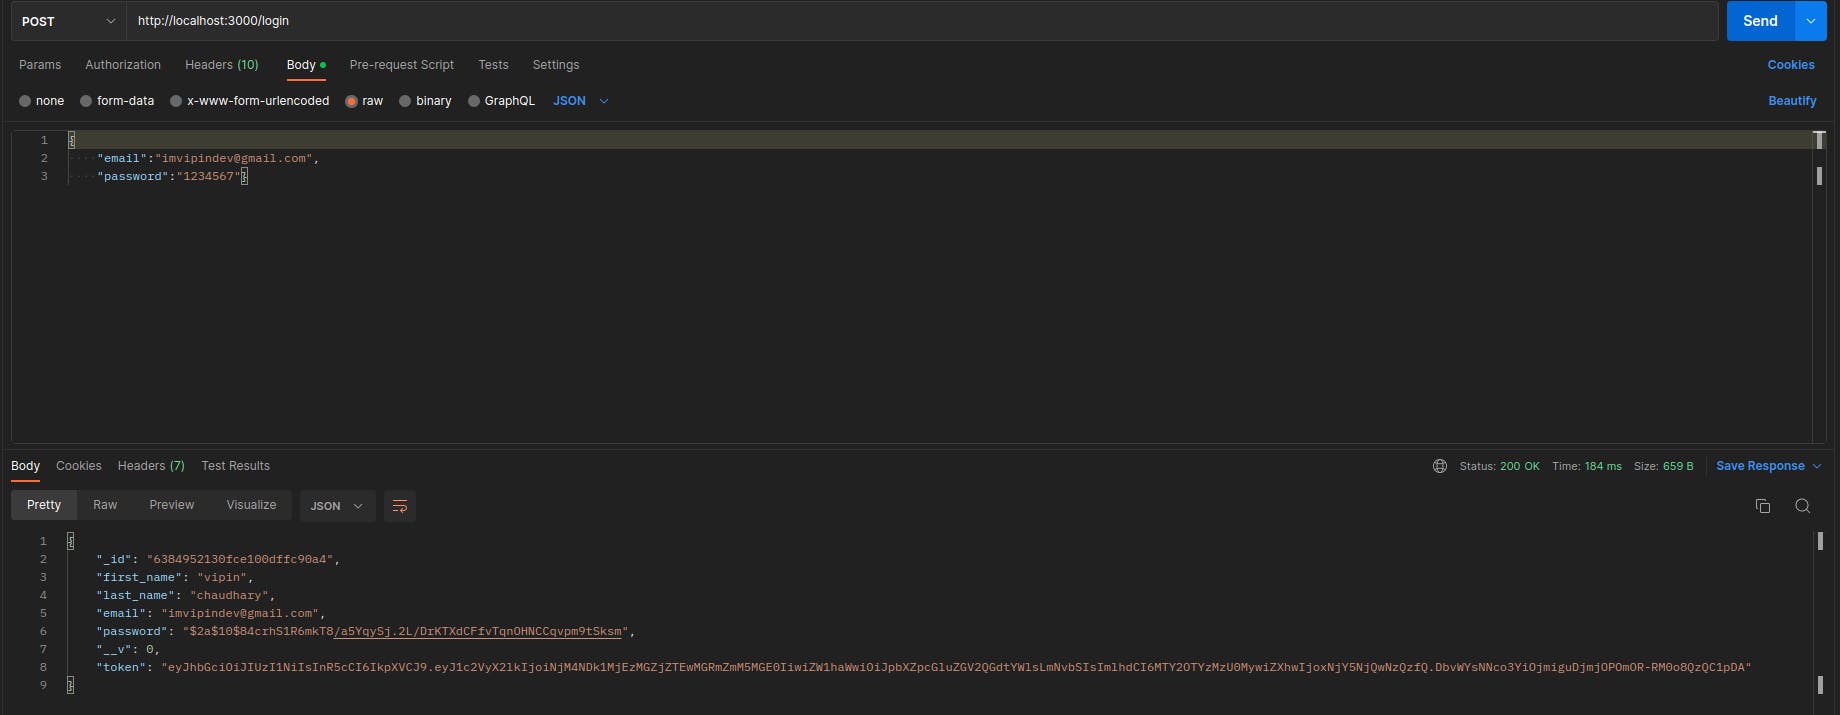
Using Postman to test, we’ll get the response shown below after a successful login.
Create middleware for authentication
We can successfully create and log in as a user. Still, we’ll create a route that requires a user token in the header, which is the JWT token we generated earlier.
To do that we will create a new file auth.js in middleware folder
First import JWT and dotenv and make a function verifytoken which is a middleware it this function we will define a variable name token and will get the value of the token from the body of the request or as the query or the x-access-token Header if the user doesn't provide any we will end the function here with a response of A toke is required for Authentication
After getting the token we can verify whether the token is correct or not by using the verify method and according to that we will add a new parameter to user request
if we got a wrong token we can give response of Invalid Token
In our middleware/auth.js
const jwt = require("jsonwebtoken");

const config = process.env;

const verifyToken = (req, res, next) => {
  const token =
    req.body.token || req.query.token || req.headers["x-access-token"];

  if (!token) {
    return res.status(403).send("A token is required for authentication");
  }
  try {
    const decoded = jwt.verify(token, config.TOKEN_KEY);
    req.user = decoded;
  } catch (err) {
    return res.status(401).send("Invalid Token");
  }
  return next();
};

module.exports = verifyToken;
Now let’s create the /welcome route to greet our user.
In our app.js
app.post("/welcome", auth, (req, res) => {
  res.status(200).send(`Welcome  🙌`);
});
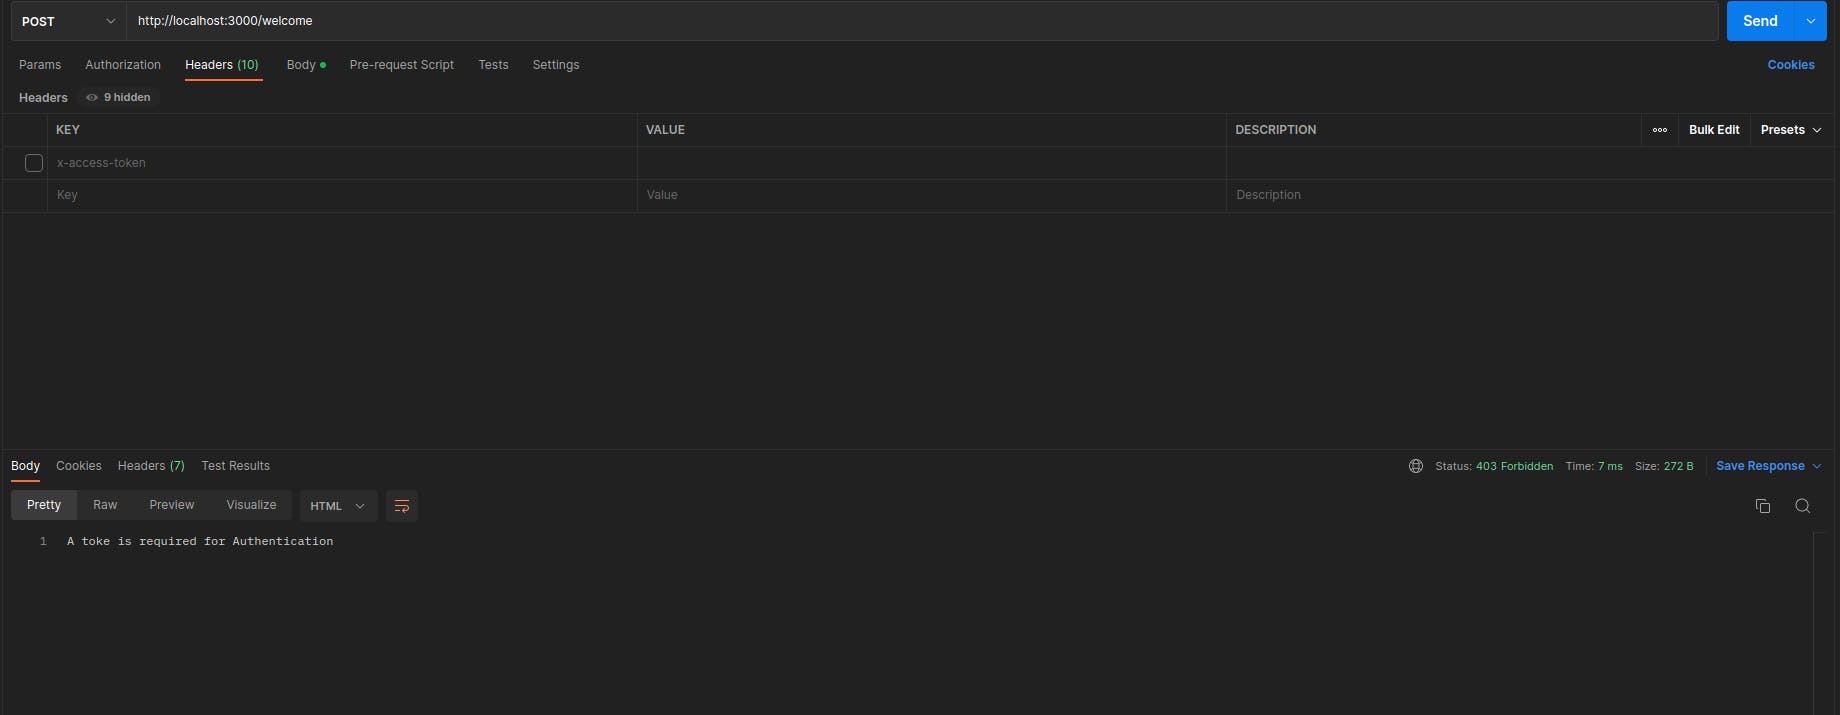
See the result below when we try to access the /welcome route we just created without passing a token in the header with the x-access-token key.
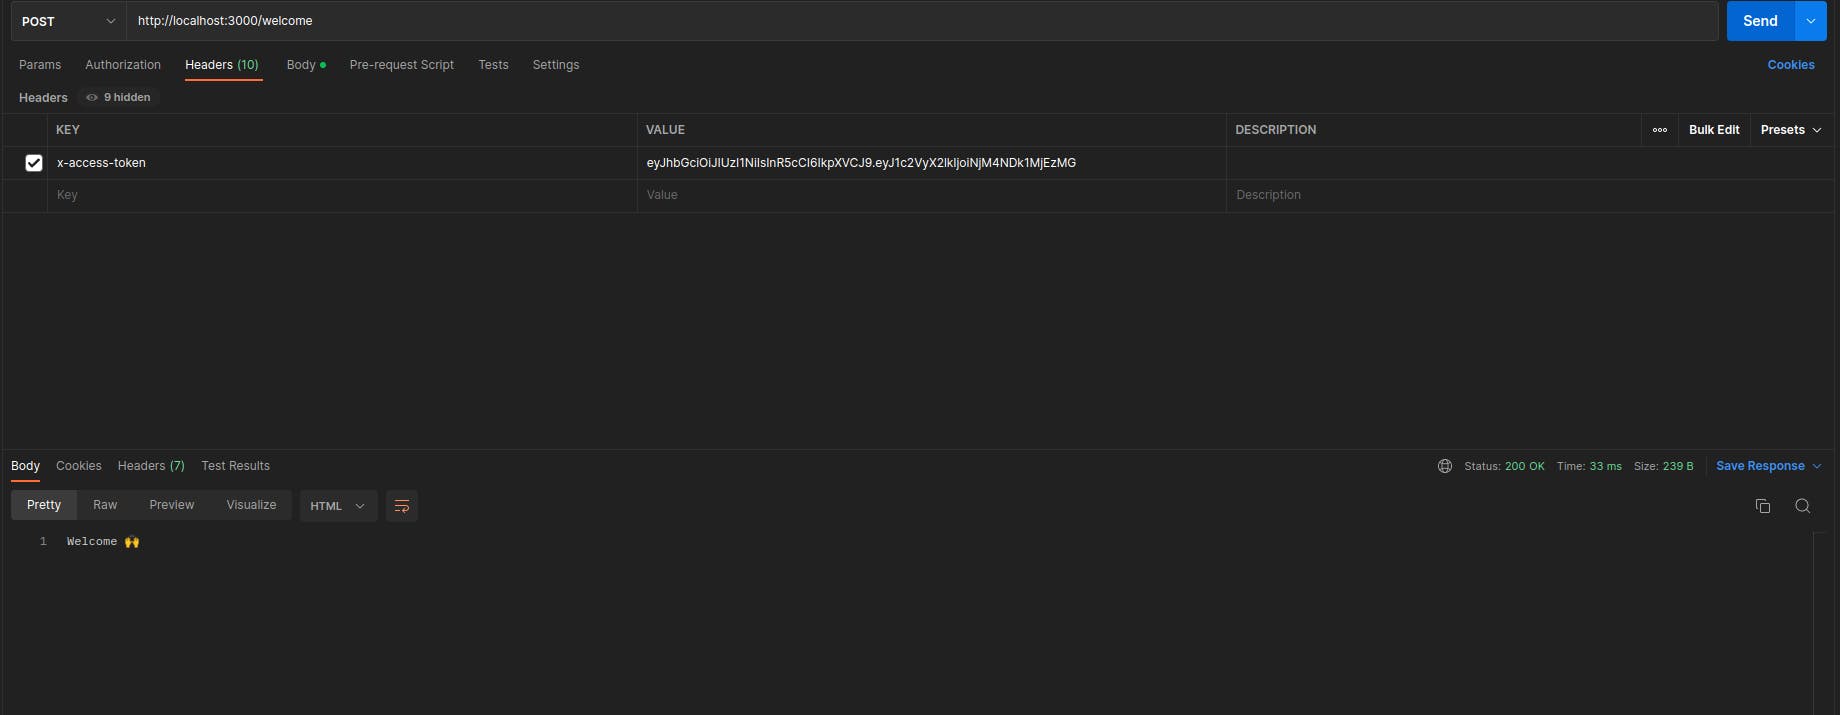
We can now add a token in the header with the key x-access-token and re-test.
See the image below for the response.
You can click here to check the complete code on GitHub.
Conclusion
In this article, we learned about JWT, authentication, authorization, and how to develop an API using JWT token for authentication in Node.js.
Do let me know if you need more articles like this. Thank you for your time.
Happy coding!